
Installation guide
Installing the Desert Vans™ Mesa Riser
Basic hand tools, no drilling into your roof. Read this page through once before you start.
How it goes together
Each riser bolts to the inside of your rack’s two rails, on the A/C side. A crossbar bolts to the top of each pair of risers, and your solar panels bolt to the crossbars. You install the rear pair first, then measure from it to place the front pair. Front and rear mean the front and rear of the vehicle.
Four bolts attach the base of each riser to the rails (two in each rail). Two bolts run down from the crossbar through the crossbar holes in the top of the riser, with a washer and nut under each one.
In the box
- Four Desert Vans Mesa Risers
Not included
- Crossbars to carry your panels. Each riser has two crossbar holes in the top (5/16" / 8 mm bolts), so confirm your crossbars come with bolts that fit, or buy them separately.
- Bolts, washers, and nuts for your rails. A set of four uses 16 bolts (5/16" / 8 mm) that suit your rack’s rails.
- Panel mounting hardware to suit your solar panels.
- Tools to fit your bolts. A power wrench is recommended, but a ratchet or hand wrench works too. You will also want a tape measure.
Check your rack first
- Your rack is the limit. Add up the weight of the panels, crossbars, bolts, and risers and confirm the total is within your rack’s rated load. Use its dynamic (driving) rating if it has one.
- Leave a generous margin. Raised crossbars and panels put more leverage on your rack than flat-mounted gear. Wind, cornering, and braking all add load.
- Confirm the fit. The risers fit racks with two horizontal, parallel rails 2-7/8" (73 mm) apart, center to center. Measure before you order and again before you install.
- Check A/C clearance. The risers hold the underside of your crossbars 7-13/16" (198 mm) above your top rail’s mounting slot. In many installs the front and rear crossbars sit ahead of and behind the A/C unit, so only the panels pass over it. Measure your A/C unit’s height above the rails and confirm your panels clear it. Panel mounts typically lift the panels another 3/4" to 1-1/4" (19 to 32 mm) above the crossbars, and the hollow underside of many panels adds almost another inch (25 mm).
- Plan for wind. Secure your panels against wind lift. The risers carry the crossbars and are not rated for wind uplift on panels.
Step by step
Eight steps
Plan your layout
Decide where your solar panels will sit over the A/C unit and where the crossbars need to be. Choose the rear riser positions first, since the front pair will be measured from them. Confirm everything clears the A/C unit. Measure up to the underside of your panels, not just the crossbars, since panel mounts and the hollow underside of the panels add clearance.
Pick the bolt points
At each riser location, make sure there will be two bolts in each rail. That is four bolts per riser: two in the upper rail and two in the lower rail.
Install the rear risers loosely
Bolt the base of each rear riser to the rails, using bolts that suit your rack. Keep the bolts loose enough that the riser can still slide forward and back along the rails. Start each riser close to a side-rail spacer support, then slide it back to its final position.
Attach the crossbar loosely
Set the crossbar across the rear pair. Slide two bolt heads into the crossbar, line the bolts up with the two holes in the top of each riser, and let the bolts come down through the holes. Put a washer and nut on the end of each bolt and turn the nut. Leave these slightly loose for now.
Tighten the rear risers a little at a time
Work around all the bolts, snugging each one a little. Confirm the risers and crossbar are in the right position, then go around again and tighten each bolt a bit more. Check that nothing has moved or shifted, and repeat until every bolt is tight.
Place the front risers
Measure from the rear risers to position the front pair, based on the size of your solar panel plus its panel brackets. Install the front risers and their crossbar the same way as the rear, but leave all the bolts slightly loose.
Mount the solar panels
Attach your panels to the crossbars using your panel mounting hardware, and tighten them down. Make sure the panels are secured against wind lift.
Tighten the front risers a little at a time
With the panels tightened down to the crossbars, check that each riser is in its proper place. Then tighten the front bolts the same way as the rear: a little at a time, checking position after each pass, until every bolt is tight.
What it looks like
A finished install


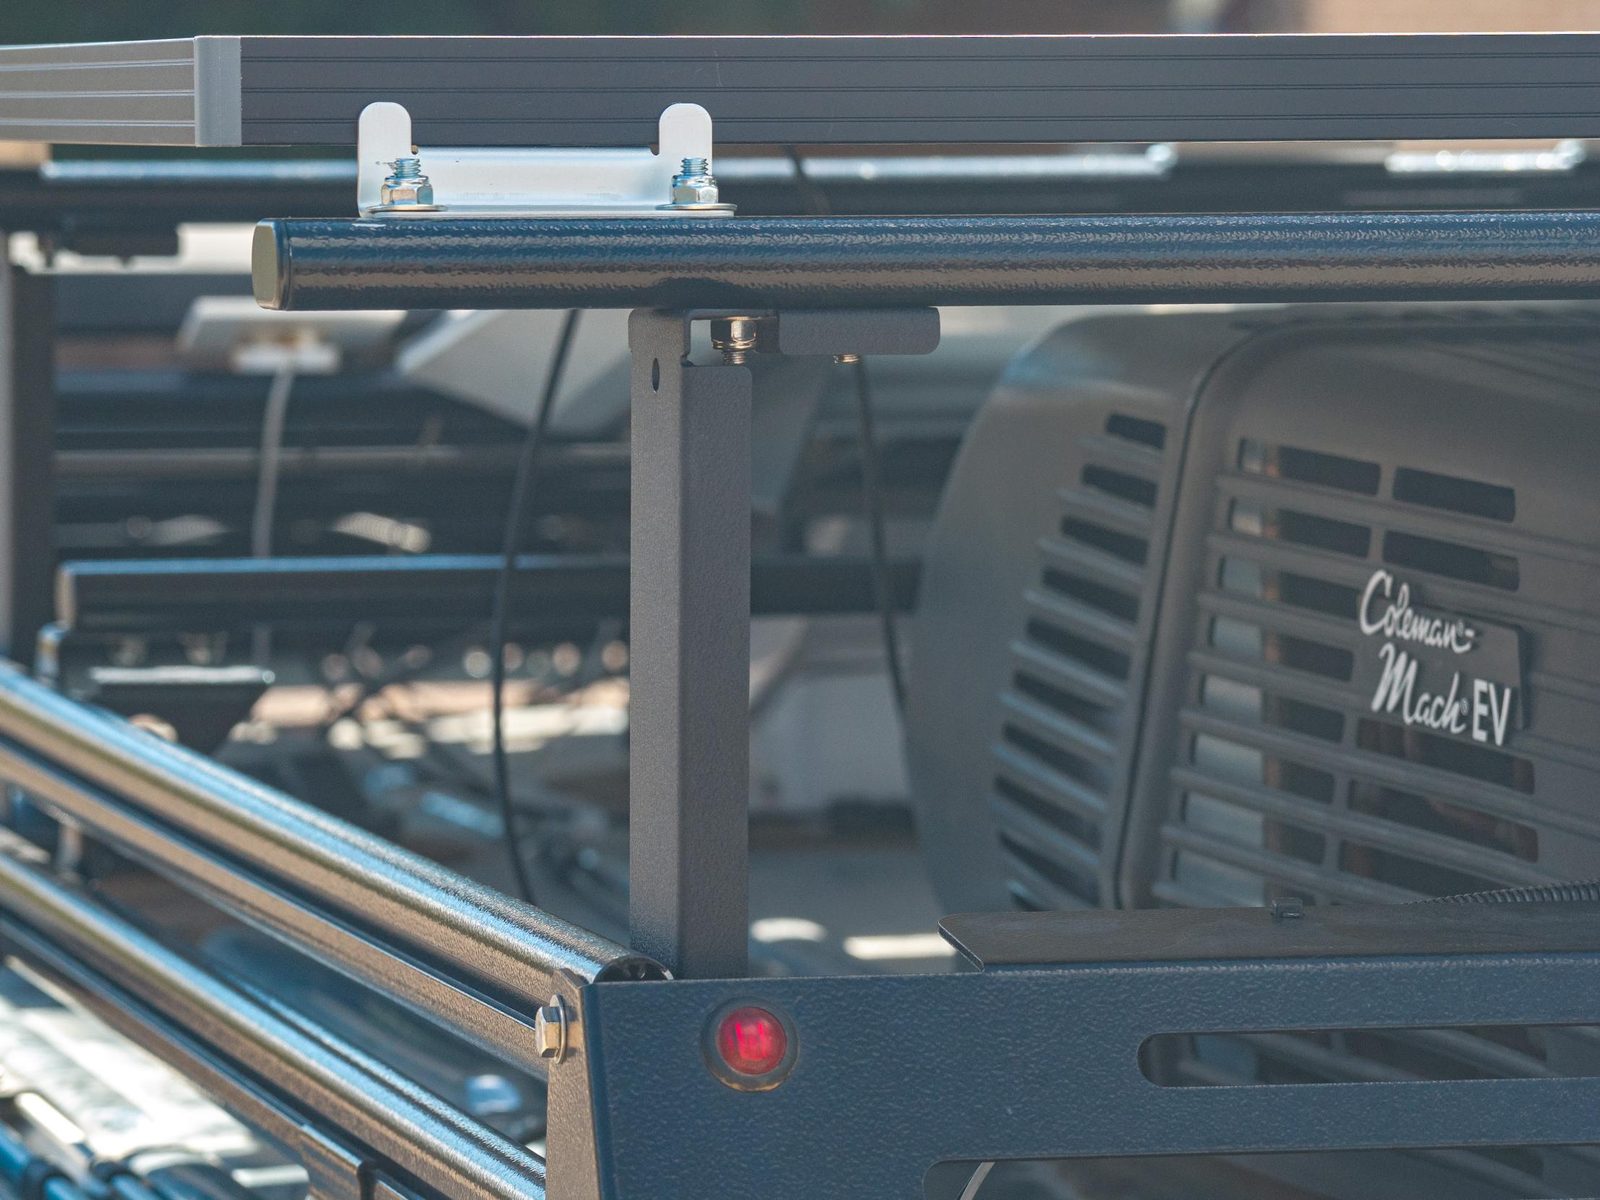
Mesa Risers installed on a van roof rack, holding crossbars and solar panels over the A/C unit.
After installation
- Retighten after the first 100 miles (160 km).
- Check all bolts regularly.
- Keep total weight within your rack’s rating and the 60 lb (27 kg) per-set limit.
Questions?
We are happy to help with fitment or installation.
info@desertbliss.com · Contact form
Install and use at your own risk.